The metallographic microscope is mainly used to identify and analyze the internal structure of metals. It is an important instrument for studying metallography and a key equipment for the industrial sector to identify product quality. The instrument is equipped with a camera device that can capture metallographic patterns and analyze the patterns. Carry out measurement analysis, edit, output, store, manage images and other functions.
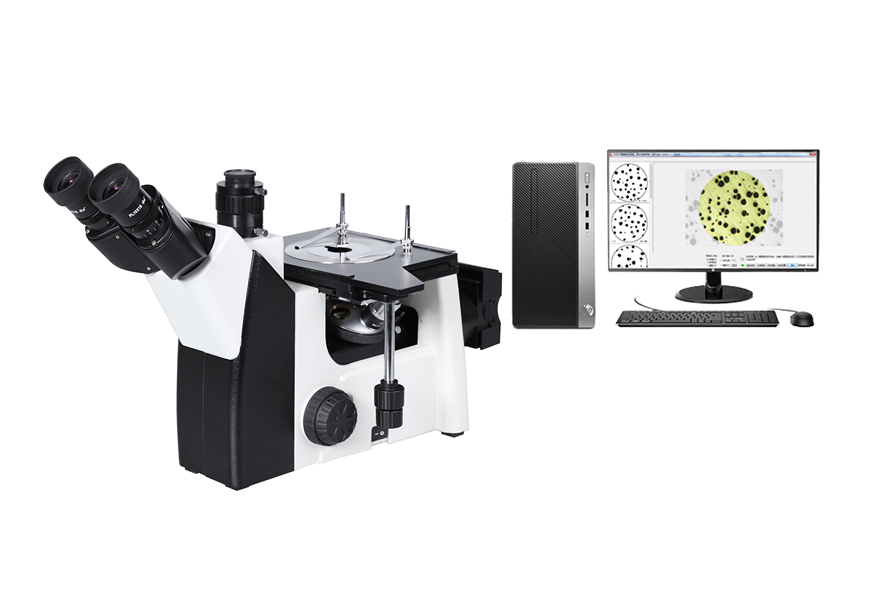
The metallographic microscope is a high-tech product developed by perfectly combining optical microscope technology, photoelectric conversion technology, and computer image processing technology.
Metallographic images can be easily observed on a computer, so that metallographic patterns can be analyzed, graded, etc. and pictures can be output and printed. As we all know, the composition of alloys, heat treatment processes, and hot and cold processing processes directly affect the changes in the internal organization and structure of metal materials, thereby changing the mechanical properties of the parts.
Therefore, using a metallographic microscope to observe, inspect and analyze the internal structure of metal is an important means in industrial production.
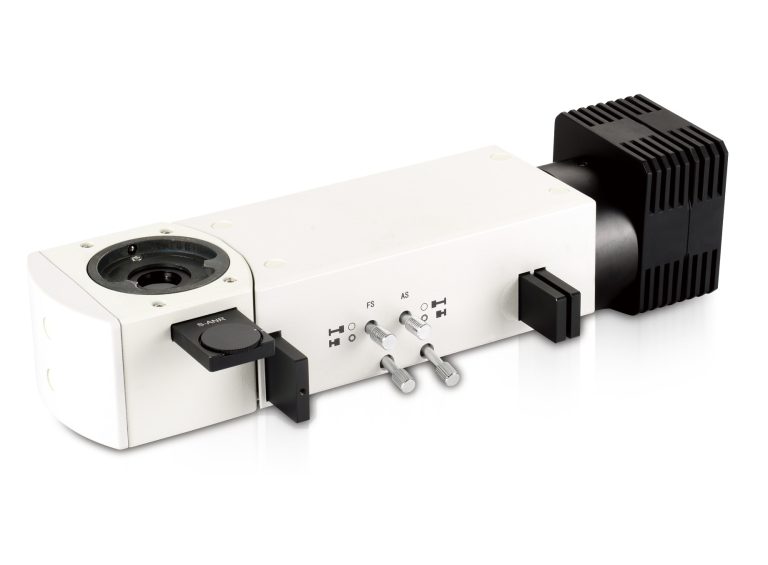
A metallographic microscope is mainly composed of an optical system, an illumination system, a mechanical system, and accessory devices (including photography or other devices such as microhardness).
According to the light reflection characteristics of different tissue components on the surface of the metal sample, these tissue components are optically studied and qualitatively and quantitatively described using a microscope in the visible light range. It can display metal tissue signs within a scale of 500 to 0.2m.
As early as 1841, the Chinese people studied the patterns on the Damascus leather steel swords under a magnifying glass. By 1863, the British had transplanted petrographic methods, including sample preparation, polishing and engraving techniques, to steel research, developed metallographic techniques, and later photographed a number of low-magnification and other tissue specimens. Metallographic photos. The scientific practices of Sobie and his contemporaries in Germany and France laid the foundation for modern optical metallographic microscopy. By the beginning of the 20th century, optical metallographic microscopy technology had been increasingly perfected and widely used in the microscopic analysis of metals and alloys. It is still a basic technology in the field of metallurgy.
A metallographic microscope is a microscope in which visible light is used as the illumination source. Both discrete and horizontal types include optical amplification, lighting and mechanical systems.
The magnification system is key to the usefulness and quality of a microscope. Mainly composed of objective lens and eyepiece.
The magnification of a gold microscope is:
M display = L/f object × 250/f mesh = M display × M mesh. In the formula [m1] M display——indicates the magnification of the microscope; [m2] M object, [m3] M mesh and [f2] f object, [f1] f mesh represents the magnification and focal length of the objective lens and eyepiece respectively; L is the length of the optical tube; 250 is the photopic distance. All length units are mm.
Resolution and Aberration The resolution of the lens and the degree of correction of aberration defects are important indicators of the quality of the microscope. In gold photography, resolution refers to the minimum resolution distance of the objective lens to the target object. Due to the diffraction phenomenon of light, the minimum resolution distance of the objective lens is limited. The German Abbe proposed the following formula for the minimum resolution distance
d=λ/2nsinφwhere [kg2][kg2] is the wavelength of the light source;
n is the refractive index of the medium between the sample and the objective lens (air; =1; turpentine: =1.5);
φ is half the aperture of the objective lens.
It can be seen from the above formula that the resolution increases as the sum increases. Because the wavelength of visible light [kg2][kg2] is between 4000 and 7000. In the most favorable case where the [kg2][kg2] angle is close to 90, the resolution distance will not be higher than [kg2]0.2m[kg2]. Therefore, the microstructure smaller than [kg2]0.2m[kg2] must be observed with the help of an electron microscope (see), while the morphology, distribution, and crystal structure of the tissue with a scale between [kg2]0.2~500m[kg2] Changes in particle size, as well as the thickness and spacing of slip zones, can be observed with an optical microscope. This plays an important role in analyzing alloy properties, understanding metallurgical processes, conducting quality control of metallurgical products, and analyzing component failure.
The degree of aberration correction is also an important factor affecting imaging quality. At low magnification, the aberration is mainly corrected through the objective lens; at low magnification, the eyepiece and objective lens need to be corrected together. There are seven main types of lens aberrations, five of which are spherical aberration, coma aberration, astigmatism, field curvature and distortion for monochromatic light. There are two types of polychromatic light: longitudinal chromatic aberration and transverse chromatic aberration. Early microscopes focused primarily on the correction of chromatic aberration and partial spherical aberration, with achromatic and apochromatic objectives depending on the degree of correction. In recent metallographic microscopes, sufficient attention has been paid to aberrations such as object field curvature and distortion. After the objective lens and eyepiece are corrected for these aberrations, not only the image is clear, but also its flatness can be maintained over a large range, which is particularly important for metallographic microphotography. Therefore, plan achromatic objectives, plan apochromatic objectives, and wide-field eyepieces are now widely used. The above-mentioned aberration correction degrees are marked on the objective lens and eyepiece respectively in the form of lens type.
The earliest metallographic microscopes used general incandescent bulbs as light source. Later, in order to improve the brightness and lighting effect, low-voltage tungsten lamps, carbon arc lamps, xenon lamps, halogen lamps, mercury lamps, etc. appeared. Some microscopes with special properties require a monochromatic light source, and sodium lamps and tuo lamps can emit monochromatic light.
The lighting method of a metallographic microscope is different from that of a biological microscope. It does not use transmitted light, but uses reflected light for imaging, so it must have a special additional lighting system, that is, a vertical lighting device. In 1872, V. von Lang created this device and made the first metallographic microscope. The original metallographic microscope only had brightfield illumination, and later developed oblique illumination to improve the contrast of some tissues.
Routine maintenance, care and precautions
To ensure the service life and reliability of the system, pay attention to the following matters:
- The laboratory should have three prevention conditions: shockproof (away from the earthquake source), moistureproof (use air conditioner, dryer), dustproof (floor covered); power supply: 220V+-10%, 50HZ temperature: 0 degrees – 40 degree.
- When adjusting the focus, be careful not to let the objective lens touch the sample to avoid scratching the objective lens.
- Do not switch the objective lens when the center of the round hole of the stage gasket is far away from the center of the objective lens to avoid scratching the objective lens.
- Do not adjust the brightness from high to low, or too bright, which will affect the service life of the bulb and damage your eyesight.
- All (function) switching should be done lightly and in place.
- Adjust the brightness to the minimum when shutting down.
- Non-professionals should not adjust the lighting system (filament position lamp) to avoid affecting the imaging quality.
- When replacing the halogen lamp, pay attention to the high temperature to avoid burns; be careful not to directly touch the glass body of the halogen lamp with your hands.
- When shutting down and not in use, adjust the objective lens to the lowest state through the focusing mechanism.
- When the machine is turned off and not in use, do not cover the dust cover immediately. Wait until it cools down before covering it again. Pay attention to fire prevention.
- Optical components that are not frequently used are placed in a drying dish.
- Non-professionals should not try to clean the objective lens and other optical components. You can use an absorbent cotton swab dipped in a 1:1 ratio (anhydrous alcohol: ether) mixed liquid and then wipe it dry. Do not use other liquids to avoid damaging the eyepiece.